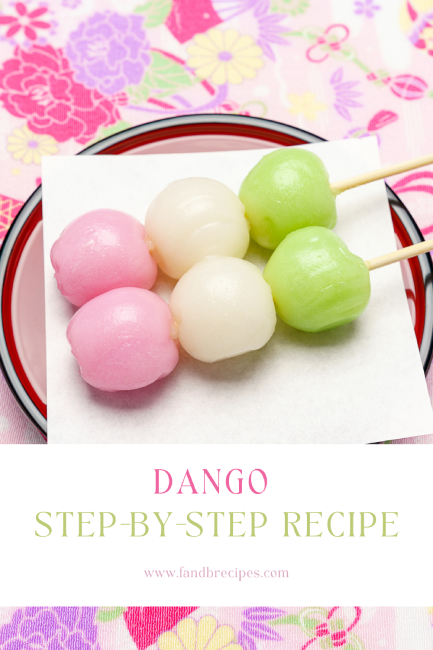
Dango: Step-By-Step Recipe
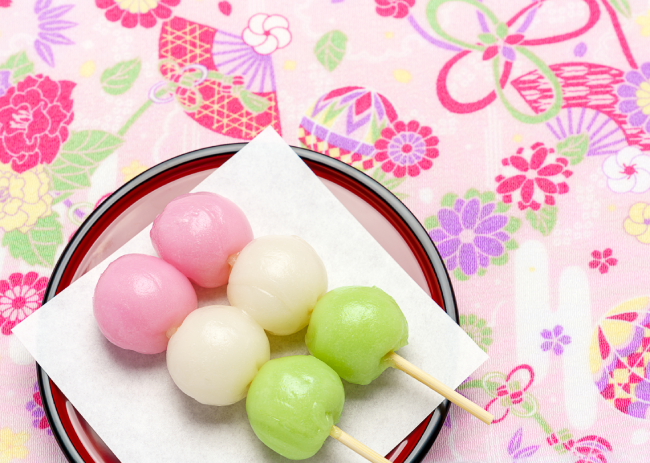
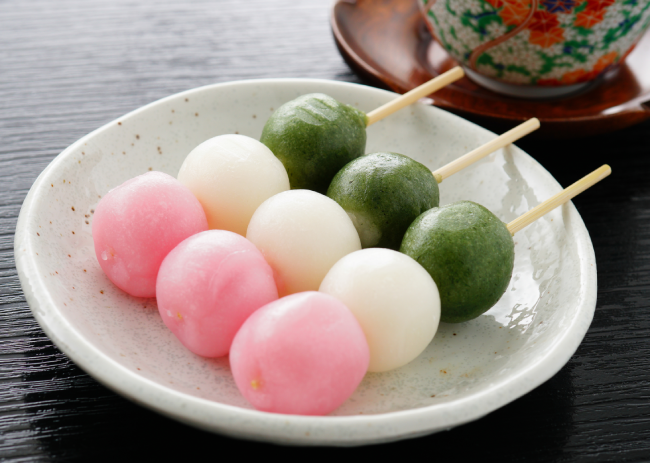
Dango is a traditional Japanese sweet that people enjoy for centuries. These delightful little dumplings consist of a mixture of rice flour and water. It then moulds into small, round shapes and boils until they are soft and chewy. They are served on a skewer, with three or four dumplings per stick, and enjoyed as a snack or dessert.
In addition, the origins of the dish are from the Edo period, which lasted from the 17th to the mid-19th century. During this time, Dango was a popular street food that vendors sold at festivals.
Over time, it has evolved into a more sophisticated dish, with different variations. Today, there are many different types of Dango, each with its own unique taste and texture. Some of the most popular variations include Mitarashi Dango. It consists of a sweet soya sauce glaze, and Anko Dango, filled with sweet red bean paste.
This dish remains a beloved part of Japanese cuisine and culture. Dango is a dish that is sure to delight anyone who tries it. So why not try making your own Dango at home? With a few simple ingredients and a little bit of patience, you can create a delicious sweet.
What is Dango?
Dango is a traditional Japanese sweet that cooks with a mixture of rice flour and water. It then shapes into small, round dumplings and boils until they are soft and chewy. The texture of the Dango is like mochi. Mochi is another popular Japanese sweet of glutinous rice. It serves on a skewer, with three or four dumplings per stick, and is often enjoyed as a snack or dessert.
You can serve it plain, with a sweet soya sauce glaze, or fill it with sweet red bean paste or other fillings. Dango is a popular food in Japan and you can find it at festivals, markets, and speciality shops all over the country.
Why This Recipe Works
This recipe for Dango works for several reasons:
- The recipe uses a simple and traditional combination of rice flour and water to make the Dango dough. It then boils until it is soft and chewy. This technique is true, and results in textured Dango.
- The recipe provides precise instructions for making the dough. Follow this to ensure that the dough is the right consistency and texture for boiling and shaping.
- In addition to that, the recipe suggests using a combination of rice flour and potato starch. It gives the Dango a little springy texture that is characteristic of a good Dango.
- The recipe provides options for Dango to be plain with a sweet soya sauce glaze, or filled with sweet red bean paste. This allows for customisation and variation based on personal taste preferences.
- In addition, the recipe includes helpful tips and tricks for shaping and boiling the Dango. It ensures that they turn out perfect every time.
Ingredients Required to Make Dango

The ingredients listed for making Dango include:
- 1 ⅓ cups Joshinko rice flour without gluten: This is a type of rice flour that is short-grain rice. It is non-glutinous and has a little gritty texture. In this recipe, it is helpful to provide structure and texture to the Dango.
- 1 ½ cup Shiratamako glutinous rice flour: This is a type of rice flour of glutinous (sticky) rice. It’s a must for creating a chewy texture. Also, it is characteristic of Dango.
- ¾ cup powdered sugar (optional): Use it to sweeten the Dango dough. Add it to the flour mixture and adjust as per taste.
- 1 ⅓ cup warm water: To bind the flour mixture together and create a dough to make dumplings.
- 1 tsp matcha powder: This is a ground green tea powder to add colour and flavour to the Dango. In this recipe, We use this with water to create a green tea paste and then add it to the dough.
- 1 drop of pink food colour: To add a pop of colour. However, it is optional and you can leave it if desired.
Tools Required
To make this dish, you will need a few essential tools:
- Mixing bowl: It helps to combine the rice flour, powdered sugar, and hot water to make the Dango dough.
- Measuring cups and spoons: Accurate measurements are important when making Dango. Therefore, You will need measuring cups and spoons to ensure that you add the correct amount of each ingredient.
- Wooden spoon or silicone spatula: You will need a wooden spoon to mix the dough together.
- Pot or saucepan: You will need a pot or saucepan to boil the Dango dumplings. Make sure the pot is large enough to hold the dumplings without crowding them
- Skewers: This is generally served on skewers and you will need bamboo skewers to thread the dumplings onto.
- Rolling pin or Dango tool (optional): It helps to shape your Dango into perfect spheres. Though, These tools are not necessary, but they can make the process easier and more efficient.
Lastly, these tools are all simple and you can find them in most kitchens. With these tools on hand, you should have everything you need to make delicious Dango at home.
Dango Recipe
Servings: 12 Dango Sticks Course: Dessert Cuisine: Asian, Japenese Prep Time: 35 minutes Cook Time: 10 minutes Total Time: 45 minutes Calories: 168 kcal
To begin making the Dango, first, put 12 small bamboo skewers in water to soak them. In a mixing bowl, add 200 grams of glutinous sweet rice flour (Shiratamako). Also 150 grams of non-glutinous rice flour (Joshinko). If you want to make it sweeter, add 75 grams of powdered sugar.
Then add 1 ⅓ cups of hot water and stir with a spoon. Mould the dough with your hands until it is similar in texture to play dough.
Next, Make three equal portions of the dough and place each part into a separate bowl. To make the pink dough, Mix after adding one drop of pink food colouring.
For the matcha dough, Make a paste by combining 1 teaspoon of water with 1 teaspoon of matcha powder. Then, Add the paste to the dough and mix well. Leave the third bowl of dough white.
In addition, start with the white dough balls, shape each dough into 20-gramme balls and cook them in boiling water. Once the balls rise to the surface of the water, continue cooking for 2 more minutes.
Then, repeat the same with the pink and green dough balls after transferring the dumplings. Then transfer it to a dish of ice water with a slotted spoon.
Finally, thread the dumplings onto the soaked bamboo skewers. Starting with the green dumplings, then white, and finishing with the pink dumplings. You can enjoy Dango as is or topped with sweet soya glaze, matcha paste or a red bean paste.
Nutritional Information
Calories: 168 kcal
Carbohydrates: 38 g
Protein: 2 g
Fat: 1 g
Saturated Fat: 1 g
Polyunsaturated Fat: 1 g
Monounsaturated Fat: 1 g
Sodium: 1 mg
Potassium: 29 mg
Fibre: 1 g
Sugar: 7 g
Vitamin A: 17 IU
Calcium: 4 mg
Iron: 1 mg
Tips
Here are a few things to keep in mind:
- Put the ingredients on the kitchen scale and weigh them. Because the texture of the dough can vary depending.
- Next, use hot water to mix the dough, as this helps to activate the gluten in the flour and create a smooth texture.
- Then, knead the dough until it is similar in texture to play-dough, but a little softer. This will make it easier to shape the dumplings into balls.
- Divide the dough into equal parts before adding the food colouring because this will help to distribute the colour throughout each piece of dough.
- In addition, cook the dumplings in the order of white, pink, and green in boiling water. Do it to avoid the colours staining the water or altering the colour of the dumplings.
- Once you cook the dumplings, transfer them to a bowl of ice water to stop the cooking process.
- Skewer the dumplings in the traditional order of green, white, and pink. Do it to represent summer grass, winter snow, and spring cherry blossoms.
- Finally, serve the Dango with traditional toppings such as sweet soya glaze, matcha paste or red bean paste.
Storing & Freezing
If you have leftovers, then you can store them in an airtight container in the refrigerator for up to 3 days. Also, You can coat them with a little bit of cornstarch before storing them.
In addition, if you want to freeze the dish, place them on a baking sheet lined with parchment paper and freeze them. Then transfer them to a freezer-safe container and store them in the freezer for up to 1 month.
You need to reheat the frozen leftovers. For that steam them for a few minutes until heated or microwave them for 30 seconds to 1 minute. Absolutely avoid overcooking them, as this can cause them to become tough and rubbery.
FAQs
What Does Dango Taste Like?
Dango has a soft and chewy texture and a mild, little sweet flavour. This flavour comes from glutinous rice flour and non-glutinous rice flour. The glutinous rice flour gives the dish its chewy texture. The non-glutinous rice flour provides a mild taste. Thus, this dish is a satisfying dessert that is popular in Japan and enjoyed by many people around the world.
What is Dango vs Mochi?
Dango and mochi are both traditional Japanese rice cakes. In spite of this, they have distinct textures and flavours.
Dango is a mixture of glutinous and non-glutinous rice flour which mixes with hot water to form a dough. The dough then shapes into small balls and boiled or steamed. It has a soft, chewy texture and a mild sweet flavour. It often serves on skewers and topped with red bean paste, sweet soya glaze, or other toppings.
On the other hand, Mochi cooks with glutinous rice and pounds it into a sticky paste. The paste then shapes into small cakes or balls. You can eat it as is or filled with sweet fillings like red bean paste or ice cream. Mochi has a soft, smooth, and chewy texture and a mild sweet flavour.
While both Dango and mochi are from rice flour, Dango has a more cake-like texture. While mochi has a sticky and chewy texture and is often served on its own or used as a wrapper for other foods.
Is Dango Sweet or Salty?
Dango can be sweet or salty depending on toppings. The traditional sweet Dango is usually flavoured with sugar. Served with sweet sauces or toppings, for example, red bean paste, sweet soya glaze or Kinako. The dish can also be savoury and served with salty or spicy sauces, such as soya sauce, miso, or chilli oil. The flavour of the dish can also vary depending on the type of flour used. For instance, with glutinous rice flour. It has a chewy texture and mild sweetness. It also depends on non-glutinous rice flour. This adds a little nutty flavour. Hence, Dango can be a versatile and delicious treat with a variety of flavour options.
Does Dango Taste Like Mochi?
Dango and mochi share some similarities. But they do have distinct differences in texture and taste. Both are from rice flour and have a chewy, sticky texture, but Dango is denser and firmer than mochi. Dango also tends to have a nutty or wheat-like flavour, while mochi has a sweeter, more delicate flavour. Dango is served on skewers and with various sweet or savoury toppings. In addition, Mochi fills with sweet fillings like red bean paste, strawberries, or ice cream.
What is Dango in India?
Dango is a traditional Japanese dessert that is not generally found or consumed in India. Indian desserts generally contain ingredients for example milk, sugar, and wheat flour. They often include some spices. Some popular Indian sweets include Gulab Jamun, Rasgulla, Barfi, Laddu, and Peda. These sweets may share some similarities in flavour with Dango. But they have distinct differences in ingredients and preparation.
Is Dango Japanese or Korean?
Dango is a Japanese sweet which contains rice flour, water, and sugar. It has various sweets and savoury toppings.
However, Korean cuisine has a similar sweet called “Tteok,” which contains rice flour. You can serve it in a variety of forms and flavours, for instance, sweet bean paste or coated in soybean powder. Tteok and Dango have distinct differences in texture, shape, and flavour. There may be similarities between the two desserts. Dango and tteok are unique to their respective cultures.
In Conclusion
Dango is a delicious and unique Japanese dessert, enjoyed on its own or with a variety of toppings. This recipe is a great way to make Dango at home, with instructions and helpful tips to ensure the best results. It has sweet dough because it contains non-glutinous rice flour with glutinous sweet rice flour. The addition of matcha powder and pink food colouring to the dough creates flavourful variations of Dango.
In addition, whether you are new to Japanese cuisine or a seasoned Dango lover, this recipe is a great way to experience both. With its mild sweetness and endless topping options, Dango is a beloved dessert. This recipe is sure to delight your taste buds and impress your friends and family. So, why not give it a try and see for yourself how delicious and fun making Dango can be?
Dango: Step-By-Step Recipe
Ingredients
- 1 ⅓ cups Joshinko rice flour without gluten
- 1 ½ cup Shiratamako glutinous rice flour
- ¾ cup powdered sugar (optional)
- 1¾ cup warm water
- 1 tsp matcha powder
- 1 drop of pink food colour
Instructions
- To begin making the Dango, first, put 12 small bamboo skewers in water to soak them. In a mixing bowl, add 200 grams of glutinous sweet rice flour (Shiratamako). Also 150 grams of non-glutinous rice flour (Joshinko). If you want to make it sweeter, add 75 grams of powdered sugar.
- Then add 1 ⅓ cups of hot water and stir with a spoon. Mould the dough with your hands until it is similar in texture to play dough.
- Next, make three equal portions of the dough and place each part into a separate bowl. To make the pink dough, Mix after adding one drop of pink food colouring.
- For the matcha dough, Make a paste by combining 1 teaspoon of water with 1 teaspoon of matcha powder. Then, Add the paste to the dough and mix well. Leave the third bowl of dough white.
- In addition, start with the white dough balls, shape each dough into 20-gramme balls and cook them in boiling water. Once the balls rise to the surface of the water, continue cooking for 2 more minutes.
- Then, repeat the same with the pink and green dough balls after transferring the dumplings. Then transfer it to a dish of ice water with a slotted spoon.
- Finally, thread the dumplings onto the soaked bamboo skewers. Starting with the green dumplings, then white, and finishing with the pink dumplings. You can enjoy Dango as is or topped with sweet soya glaze, matcha paste or a red bean paste.
Notes
- Put the ingredients on the kitchen scale and weigh them. Because the texture of the dough can vary depending.
- Next, use hot water to mix the dough, as this helps to activate the gluten in the flour and create a smooth texture.
- Then, knead the dough until it is similar in texture to play-dough, but a little softer. This will make it easier to shape the dumplings into balls.
- Divide the dough into equal parts before adding the food colouring because this will help to distribute the colour throughout each piece of dough.
- In addition, cook the dumplings in the order of white, pink, and green in boiling water. Do it to avoid the colours staining the water or altering the colour of the dumplings.
- Once you cook the dumplings, transfer them to a bowl of ice water to stop the cooking process.
- Skewer the dumplings in the traditional order of green, white, and pink. Do it to represent summer grass, winter snow, and spring cherry blossoms.
- Finally, serve the Dango with traditional toppings such as sweet soya glaze, matcha paste or red bean paste.


Your cookbook and recipes are a staple in my kitchen! I’m excited to try this new recipe! Thanks for the recommendation!
good !!! and outstanding
must try dango japanese candy
Dango! loved delicious and yummy thanks for sharing!
Seen this Dango in japnese cartoons and movies.finally got to know how it made.all thanks to this article!!!
Sweet and chewy. Perfect to enjoy…
Unique and yummy
Really excited to try all this new recipes from your blog.
Keep posting,thanks for sharing.
looks yum… loved it!
How colourful and tasty!
colorful dango makes the mood joyful
The smoothie had a velvety consistency that was incredibly satisfying,
Sweet and chewy recipe