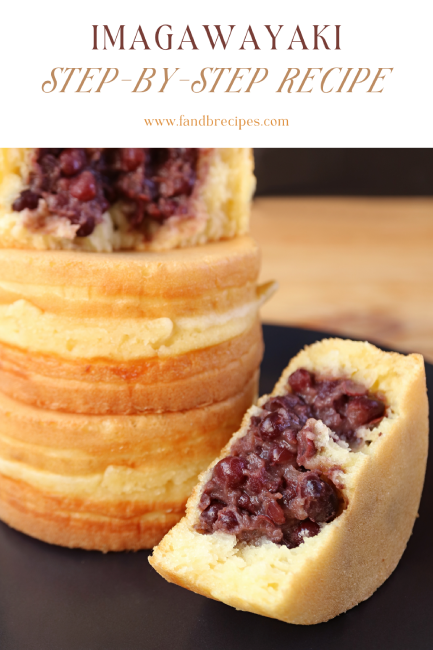
Imagawayaki: Step-By-Step Recipe
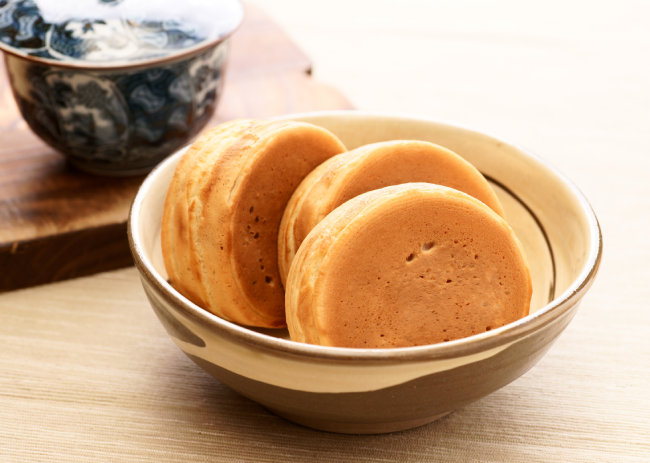
Imagawayaki is a popular Japanese snack that people have been enjoying for centuries. It is a type of sweet pancake that you can make with a batter of flour, sugar, eggs, and water. And cooked on a special iron griddle called an Imagawa-ki. The griddle is round and has shallow, circular indentations. It gives the pancake a signature shape.
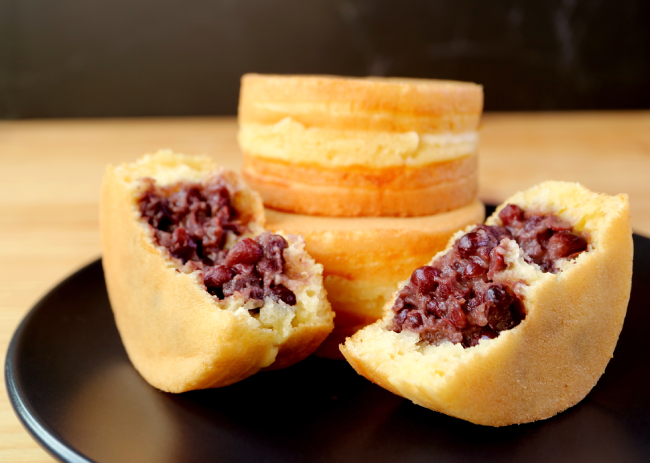
One can fill Imagawayaki with sweet red bean paste, known as anko. People make Anko from boiled and mashed Azuki beans mixed with sugar. Anko is a popular ingredient in Japanese sweets. It is usually used in many other desserts, such as Mochi and Dorayaki. People make the anko filling in Imagawayaki by simmering the Azuki beans with sugar until they become soft and sweet. Once the Anko is ready, it is then placed in the centre of the pancake batter on the griddle. And then covered with more batter.
The pancake is then flipped and cooked until it is golden brown on both sides. The result is a warm, fluffy pancake with a sweet and gooey centre.
Anko is the most traditional filling for Imagawayaki. There are many variations of the snack that feature different types of fillings. Some Imagawayaki fillings contain custard, chocolate, or cream. While others may have savoury fillings such as cheese, sausage, or vegetables. Some vendors even offer seasonal flavours for example pumpkin or chestnut.
What is Imagawayaki?
Imagawayaki is a traditional Japanese snack. It consists of a sweet pancake-like batter. It then cooks on a special iron griddle called an Imagawa-ki. The griddle has shallow, circular indentations that give the pancake its signature shape. The batter is of flour, sugar, eggs, and water. It then cooks until it is golden brown on both sides.
The snack fills with sweet red bean paste, known as anko. Anko is made of boiled and mashed azuki beans mixed with sugar.
Why This Recipe Works
There are several reasons why the recipe for Imagawayaki works so well.
Firstly, the batter is of simple ingredients that are easy to find in most stores. The combination of flour, sugar, eggs, and water creates a light and fluffy batter. It cooks up well on the griddle.
Secondly, the use of an Imagawa-ki griddle is essential to making Imagawayaki. The shallow, circular indentations in the griddle give the pancake its distinctive shape. It ensures that it cooks well on both sides.
Thirdly, the filling is a mix of sweet red bean paste. It is a popular ingredient in Japanese sweets. The anko filling is sweet, and gooey, and provides a perfect contrast to the fluffy pancake batter.
Fourth, people enjoy the snack hot off the griddle. It makes it a delicious and comforting treat. The warm sweet pancake and the gooey filling are the perfect combinations for a dessert.
Finally, Imagawayaki has a long history and cultural significance in Japan. It helped to make it a beloved snack that is now enjoyed by people of all ages. Its popularity has also led to many variations. Allowing for different fillings and flavours to be then added to the basic batter.
Ingredients Required to Make Imagawayaki
You’ll require the following ingredients:
- All-purpose flour (2 cups): All-purpose flour is the main dry ingredient used in the batter. It provides structure and stability to the Imagawayaki.
- Whole milk (1 ¼ cup): Whole milk gives the batter a creamy and rich texture. Also, It helps to make the Imagawayaki tender and moist.
- Eggs (2 large): Eggs provide structure and richness to the batter. They also help the batter to rise when baking.
- Baking powder (2 tsp): Baking powder is a leavening agent that helps the batter to rise and become fluffy when baking.
- Sugar (2 Tbsp): Sugar adds sweetness to the batter, making the Imagawayaki taste delicious.
- Neutral-flavoured oil (1 Tbsp): The oil used to grease the pan. It will prevent the Imagawayaki from sticking and give it a crispy exterior. A neutral-flavoured oil like vegetable, rice bran, or canola is helpful. It is because it doesn’t interfere with the flavour of the Imagawayaki.
- Honey (2 Tbsp): Honey is another sweetener you can use in the recipe that adds a unique flavour and texture to the batter.
- Sweet red bean paste (Anko) 2 Tbsp: Anko is a sweet paste made from adzuki beans that people use in Japanese desserts. It adds a sweet and nutty flavour to the Imagawayaki.
Tools Required to Make Imagawayaki
To make Imagawayaki, you will need several tools and equipment, including:
- Imagawa-ki griddle: This is a round, cast-iron griddle with shallow, circular indentations. They are essential to create the signature shape of the pancake.
- Spatula: You will need a spatula to flip the pancake over on the griddle.
- Mixing bowl: A mixing bowl helps to mix the batter ingredients.
- Whisk or fork: You will need a whisk or fork to mix the batter until it is smooth.
- Ladle: A ladle helps to pour the batter onto the griddle.
- Brush or paper towel: To prevent the batter from sticking, you will need a brush or paper towel to apply oil to the griddle. And also to keep the girdle well-oiled.
- Filling: To fill the pancakes, you will need a spoon or piping bag, depending on the type of filling you are using.
- Plate: Once the cooking of pancakes is over, you will need a plate to transfer them to.
- Oven mitt or towel: To protect your hands from the heat of the griddle, you will need an oven mitt or towel.
Imagawayaki Recipe
Servings: 8 Prep time: 10 minutes Cook time: 25 minutes Total time: 50 minutes Cuisine: Japanese Course: Dessert, Snack
Begin by whisking eggs and sugar in a large mixing bowl.
Add honey and whole milk to the mixture and combine well. Sift all-purpose flour and baking powder together, and then add it to the egg mixture.
Further, mix well until all ingredients are well combined. Then rest the batter for at least 15 minutes to allow the gluten to relax.
While the batter is resting, take 2 tablespoons of sweet red bean paste. Then shape it into a round disk that will fit in the centre of each pancake.
Heat up the pan over low heat to 350ºF (175ºC) as high heat can cause uneven heating. Use a small piece of paper towel to apply a thin layer of vegetable oil to the pan. Wipe off the excess oil with a clean paper towel.
In addition, heat the pan first. Then pour the batter into a liquid measuring cup for easy pouring, and then fill the pan halfway with batter. Cook for 2 minutes, then add the red bean paste and set the timer for 3 minutes. After 1 minute, pour batter into the empty third of the pan and cook for the remaining 2 minutes.
Using a small metal spatula or skewer, pick up two pancakes with the filling. Then place them on top of the pancakes without filling.
Press down and cook for another 2 minutes. Loosen the edges of the pancakes and remove them from the pan. Lastly, cool the Imagawayaki on a wire rack, and repeat the process until all batter gets finished.
Imagawayaki: Nutritional Information
Calories: 279 kcal
Carbohydrates: 53 g
Protein: 8 g Fat: 6 g
Saturated Fat: 4 g
Polyunsaturated Fat: 1 g
Monounsaturated Fat: 1 g
Trans Fat: 1 g
Cholesterol: 50 mg
Sodium: 178 mg
Potassium: 268 mg
Fibre: 3 g
Sugar: 21 g
Vitamin A: 127 IU
Vitamin C: 1 mg
Calcium: 119 mg
Iron: 4 mg
Tips To Make The Best Imagawayaki
Here are some tips to help you make the best Imagawayaki:
- Use the right temperature: It’s important to preheat the Imagawa-ki griddle to the right temperature before cooking. The ideal temperature is around 180-200°C (356-392°F). It allows the batter to cook well without burning.
- Oil the griddle well: It helps to prevent the batter from sticking to the griddle. It’s important to oil the griddle well before cooking. You can use a brush or a paper towel to apply a thin layer of oil to the griddle.
- Pour the batter: In addition to the above things, use a ladle to pour the batter into each indentation on the griddle. Make sure not to overfill the indentations, as this can cause the batter to spill over the edges.
- Flip the pancake with care: When it’s time to flip the pancake, use a spatula to turn it over. Always be gentle to avoid tearing the pancake or spilling the filling.
- Cook the pancake well: It’s important to cook the pancake on both sides to ensure that it’s fully cooked and golden brown. Afterwards, check the pancake from time to time to avoid burning it.
- Fill the pancake: When filling the pancake with anko or other fillings, use a spoon or piping bag to distribute the filling. Always be careful not to overfill the pancake, because this can cause it to break or become too messy to eat.
- Serve the pancake hot: Imagawayaki is best enjoyed hot off the griddle. So serve it immediately after cooking for the best flavour and texture.
Finally, by following these tips, you can make delicious and perfectly-shaped Imagawayaki. It will impress your family and friends.
Storing & Freezing
Imagawayaki is best enjoyed fresh and hot off the griddle, but you can also store and freeze them for later. Here are some tips for storing and freezing Imagawayaki:
- Store at room temperature: If you plan to eat the Imagawayaki within a few hours, you can store them at room temperature in an airtight container because this will help keep them soft and prevent them from drying out.
- Refrigerate for longer storage: If you need to store the Imagawayaki for a longer period of time, you can refrigerate them for up to a few days. In addition, place them in an airtight container or plastic bag and store them in the refrigerator. When you’re ready to eat them, reheat them in the microwave or toaster oven.
- Freeze for even longer storage: You can freeze Imagawayaki for up to a few months. To freeze them, place them in an airtight container or plastic bag and store them in the freezer. When you’re ready to eat them, thaw them at room temperature and reheat them in the microwave or toaster oven.
- Separate with parchment paper: To prevent the Imagawayaki from sticking together when frozen use parchment paper. Despite that, You can separate them with parchment paper or wax paper.
- Reheat: When reheating Imagawayaki, be careful not to overheat them or they may become tough or dry. Use a low heat setting and heat them in short increments until they are warm and soft.
FAQs
What Is Imagawayaki In Japanese?
Imagawayaki is a type of Japanese snack or dessert. It consists of a pancake-like batter filled with sweet red bean paste (Anko) or other fillings. The name “Imagawayaki” came from the name of a historical figure, Imagawa Yoshimoto. He was a Japanese samurai in the Sengoku period. According to legend, Imagawa Yoshimoto enjoyed eating a similar type of pancake. It later became known as Imagawayaki. Today, Imagawayaki is a popular street food in Japan. Also, You can find it at festivals, food stalls, and speciality shops.
What Is Imagawayaki Made Of?
Imagawayaki includes pancake-like batter which cooks on a griddle with round indentations. The batter usually cooks with flour, sugar, eggs, baking powder, and water or milk. The batter pours into the indentations on the griddle. Also, the batter fills with sweet red bean paste (Anko) or other fillings.
Fillings such as custard, chocolate, cheese, or fruit. The fillings then add to one side of the pancake. You can cover it with more batter before the pancake flips over to cook the other side. Cook both sides until the pancake is golden brown. Remove it from the griddle and serve hot. Imagawayaki is a popular Japanese snack or dessert that people enjoy on the go or as a treat with tea or coffee.
Is Taiyaki And Dorayaki The Same?
Taiyaki and dorayaki are similar but not exactly the same. They are both Japanese snacks. People make it with pancake-like batter and filled with sweet fillings. But there are some differences between them.
Taiyaki is a fish-shaped snack. People make it by pouring pancake batter into a special fish-shaped mould. And then fill it with sweet red bean paste (Anko), custard, chocolate, or other fillings. The batter then cooks until it is golden brown and crispy on the outside. The filling should be soft and sweet on the inside.
Further, Dorayaki, on the other side, is a flat, round snack. It is usually made by sandwiching sweet red bean paste (Anko) between two small pancakes. People make pancakes with a similar batter as Taiyaki. But not cooked in a special mould and are thinner and flatter. Also, The complete dorayaki is soft and a little chewy with a sweet filling.
What Is Manju Vs Mochi?
Manju and mochi are both traditional Japanese sweets. But they have some differences in their ingredients and preparation.
On one side, Manju is a Japanese confection. It consists of a dough-like outer shell and is filled with a sweet filling. The outer shell is of wheat flour and water or rice flour. The filling is of a variety of ingredients. Ingredients such as sweet bean paste (Anko), chestnuts, or fruit. The dough is usually steamed or baked, and the filling mixes. Manju can have a variety of shapes, such as round or rectangular. You can design it with different designs or patterns on top.
Mochi is a soft and chewy Japanese sweet. It cooks with glutinous rice flour (Mochiko) and water. The mixture is then kneaded and shaped into small, bite-sized pieces or larger round cakes. Mochi can be plain or filled with sweet bean paste (Anko), fruit, or other fillings. Mochi cooks by pounding steamed glutinous rice with a wooden mallet. The process is well known as Mochitsuki. But nowadays you can also use a mochi-making machine.
What Is Dessert Called In Japan?
In Japanese cuisine, dessert is often referred to as “Wagashi”. Wagashi which means “Japanese sweets”. Further, Wagashi refers to a variety of traditional Japanese sweets. Sweets include mochi, Manju, Dango, Yokan, and many others. These sweets are of natural and seasonal ingredients. Ingredients such as sweet bean paste, chestnuts, fruits, and herbs. And are then served as a light and delicate after-meal treat or with tea during a tea ceremony. But now, Western-style desserts such as cakes, and pies have become more popular in Japan. These are also referred to as “Dezāto”.
What Is A Japanese Wheel Cake?
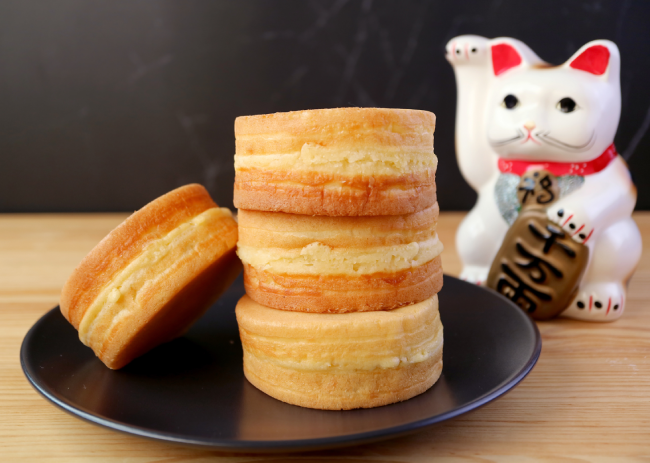
A Japanese wheel cake, also known as “Obanyaki” or “Imagawayaki,”. It is a popular Japanese dessert, a simple pancake-like batter cooked on a special griddle with round indentations.
In Conclusion
At last, Japanese wheel cakes, are known as Obanyaki or Imagawayaki. These are delicious and popular snacks or desserts in Japan. You can make this with a simple pancake-like batter cooked on a special griddle with round indentations. Fill it with sweet red bean paste or other fillings such as custard, chocolate, cheese, or fruit.
You can enjoy Obanyaki and Imagawayaki on the go or as a treat with tea or coffee. They are a great way to experience traditional Japanese sweets.
Finally, Follow these tips for making the best Imagawayaki. You can create this delicious snack in the comfort of your own home. Also, You can impress your friends and family with your Japanese culinary skills.
Imagawayaki: Step-By-Step Recipe
Ingredients
- 2 cups All-purpose flour
- 1¼ cup whole milk
- 2 eggs large
- 2 tsp baking powder
- 2 tbsp sugar
- 1 tbsp Neutral-flavoured oil
- 2 tbsp honey
- 2 tbsp Sweet red bean paste (Anko)
Instructions
- Begin by whisking eggs and sugar in a large mixing bowl.
- Add honey and whole milk to the mixture and combine well. Sift all-purpose flour and baking powder together, and then add it to the egg mixture.
- Further, mix well until all ingredients are well combined. Then rest the batter for at least 15 minutes to allow the gluten to relax.
- While the batter is resting, take 2 tablespoons of sweet red bean paste. Then shape it into a round disk that will fit in the centre of each pancake.
- Heat up the pan over low heat to 350ºF (175ºC) as high heat can cause uneven heating. Use a small piece of paper towel to apply a thin layer of vegetable oil to the pan. Wipe off the excess oil with a clean paper towel.
- In addition, heat the pan first. Then pour the batter into a liquid measuring cup for easy pouring, and then fill the pan halfway with batter. Cook for 2 minutes, then add the red bean paste and set the timer for 3 minutes. After 1 minute, pour batter into the empty third of the pan and cook for the remaining 2 minutes.
- Using a small metal spatula or skewer, pick up two pancakes with the filling. Then place them on top of the pancakes without filling.
- Press down and cook for another 2 minutes. Loosen the edges of the pancakes and remove them from the pan. Lastly, cool the Imagawayaki on a wire rack, and repeat the process until all batter gets finished.
Notes
- Use the right temperature: It's important to preheat the Imagawa-ki griddle to the right temperature before cooking. The ideal temperature is around 180-200°C (356-392°F). It allows the batter to cook well without burning.
- Oil the griddle well: It helps to prevent the batter from sticking to the griddle. It's important to oil the griddle well before cooking. You can use a brush or a paper towel to apply a thin layer of oil to the griddle.
- Pour the batter: In addition to the above things, use a ladle to pour the batter into each indentation on the griddle. Make sure not to overfill the indentations, as this can cause the batter to spill over the edges.
- Flip the pancake with care: When it's time to flip the pancake, use a spatula to turn it over. Always be gentle to avoid tearing the pancake or spilling the filling.
- Cook the pancake well: It's important to cook the pancake on both sides to ensure that it's fully cooked and golden brown. Afterwards, check the pancake from time to time to avoid burning it.
- Fill the pancake: When filling the pancake with anko or other fillings, use a spoon or piping bag to distribute the filling. Always be careful not to overfill the pancake, because this can cause it to break or become too messy to eat.
- Serve the pancake hot: Imagawayaki is best enjoyed hot off the griddle. So serve it immediately after cooking for the best flavour and texture.


Excited to give a try
good !!!!
yummy..
just amazing and easy recipe!
Super amazing
Learnt a new dish-Imagawayaki.simple and easy procedures.will try out!
delightful snack!!!
A yummy sweet snack
Imagawayaki it sounds good . Excited to try and taste first.
I loved it!
yummy and healthy.. thanks for sharing
delicious
After trying this recipe, I can’t wait to make it again and share it with friends and family.
Tastyy and yummy snack